

So last year I showed you how to expand my chicken coop. This year’s homesteading project is building a chicken brooder. After we lost a few chickens from our flock to predators over the summer months, we decided to add more. I say flock like we have 100s of chickens, we don’t, we have 4 right now.
First step was to figure out how many we were adding. We live inside the city limits, we are limited to how many we can have. We decided to expand our flock to 10-12 chickens and I didn’t want to have our second bathroom out of order for months. We used a large clear plastic bin at first but once they learned to jump and flap those wings they loved getting out of the box. And we would know when that happened too, the other baby chickens would squawk and sell them out. It was cute and annoying at the same time.
So using what we have learned over the last couple of years we decided to make a chicken brooder box, a plastic bin was not going to cut it this time around to keep them until they are old enough to go outside, which is roughly 16 weeks. At this point we are probably wondering why I just have our chickens hatch their own eggs. That is easy, because we don’t have roosters. You need roosters to have baby chickens. Why don’t we have roosters? We are not allowed to have roosters, sad I know. I would love to hatch my own chickens. So until that changes we do what we have to do and for us that means making a brooder box.
Chicken Brooder box
Materials
- 3 2×4 exterior plywood
- 8 2x2x8 post
- 1 4x4x8 post
- 2 2 inch hinges
- ¼ wire mesh
- #5 ⅝ inch screws
- 3 inch exterior screws
- Finishing nails
- Poultry net staples
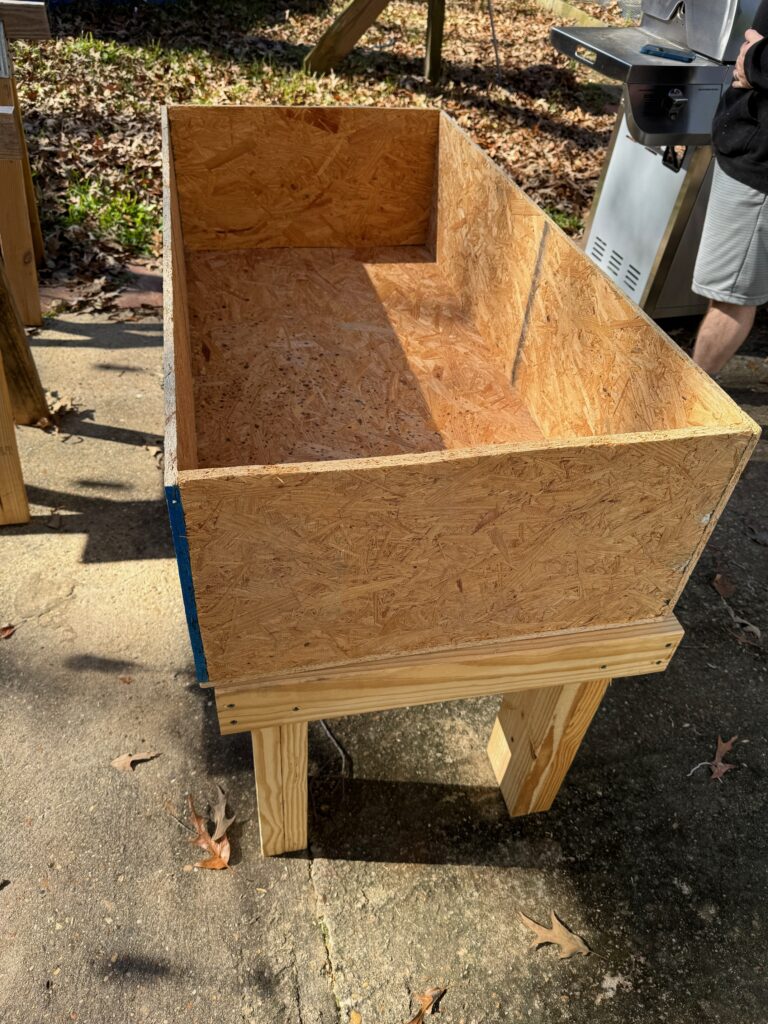
Bottom Assembly
We first built the bottom section, using 3 sheets of 2′ x 4′ exterior plywood. One sheet of plywood is used for the bottom. Take the second sheet of plywood and cut in half lengthwise making two 12”x4’ sections. Take the third sheet and plywood and cut it in half widthwise making two 2’x2’ squares. Take one of the 2’x2’ halves and cut into half making two 12”x2’ sections.
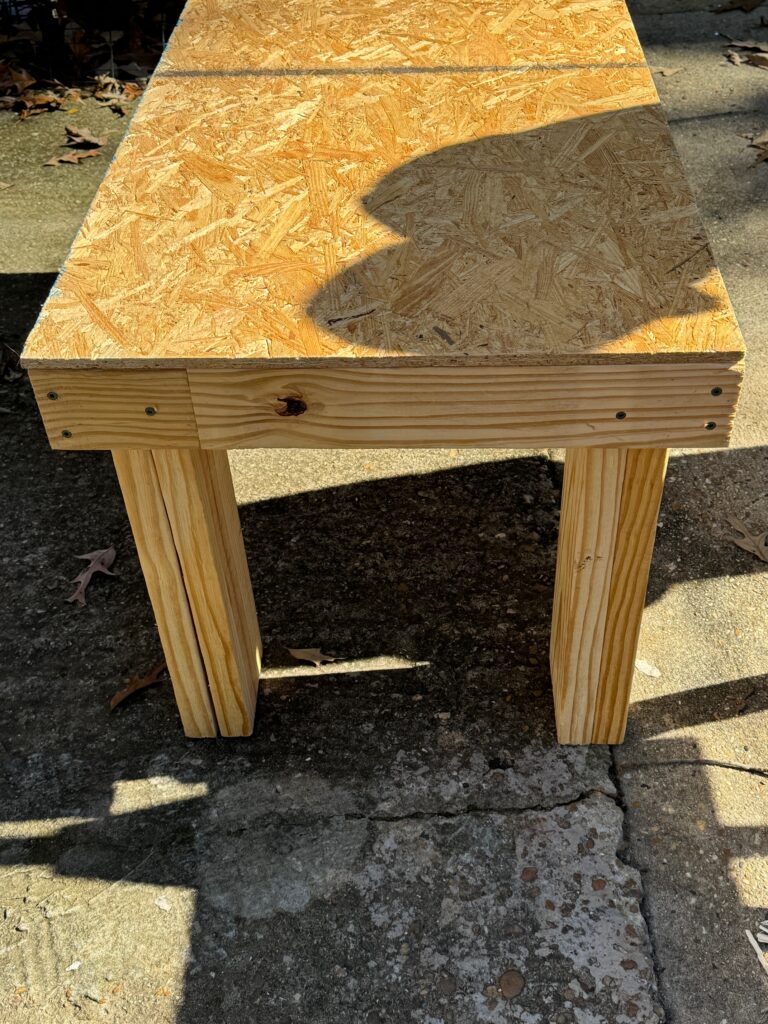
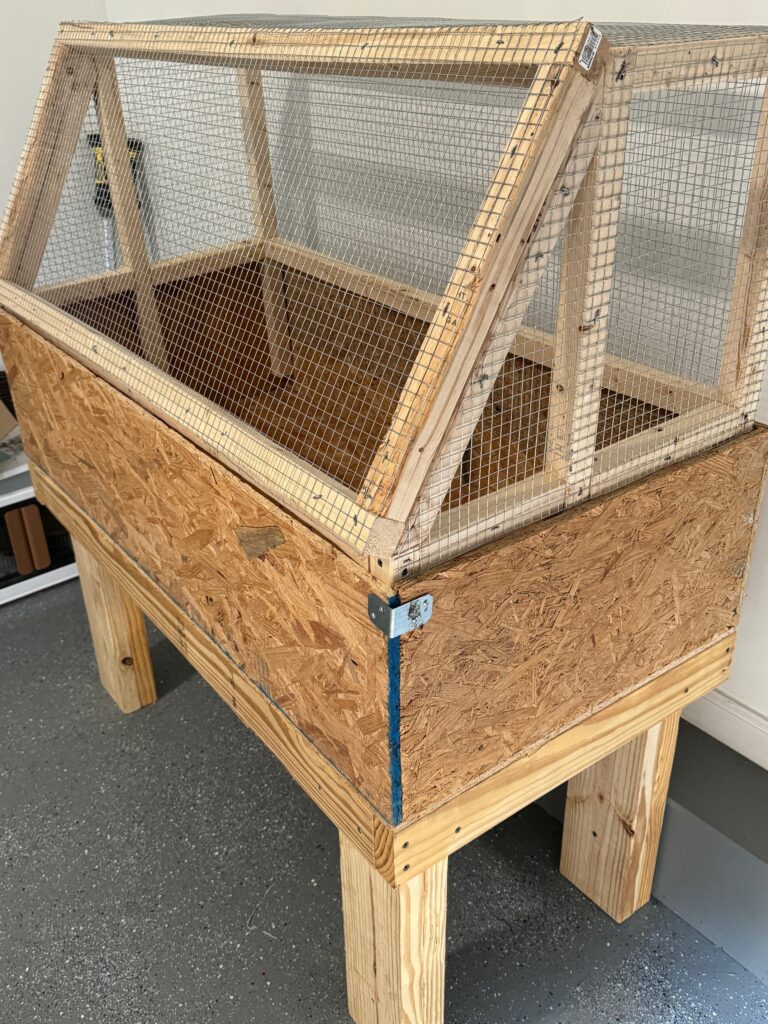
The bottom section measures 48″ long x 24″ wide and 12″ deep.
Use finishing nails to secure the corners, making sure each corner is 90˚, then use #5 ⅝ inch screws to firmly attach the sides together. Once the sides are attached, place the bottom piece on top and secure it with the finishing nails and screws. Making sure that the bottom is leveled.
Take the 4x4x8 and cut it into four 4x4x2 posts. Using 4 three (3) inch exterior screws attach one post in each corner. Flip the bottom of the brooder up.
Top Assembly
The upper portion of the brooder box was built only using 2″ x 2″ x 8′ lumber, a total of 8 pieces. The top we made just slightly smaller than the bottom so that the top could fit inside the bottom box without any gaps. Use a measuring tape to get the exact inside box measurement.
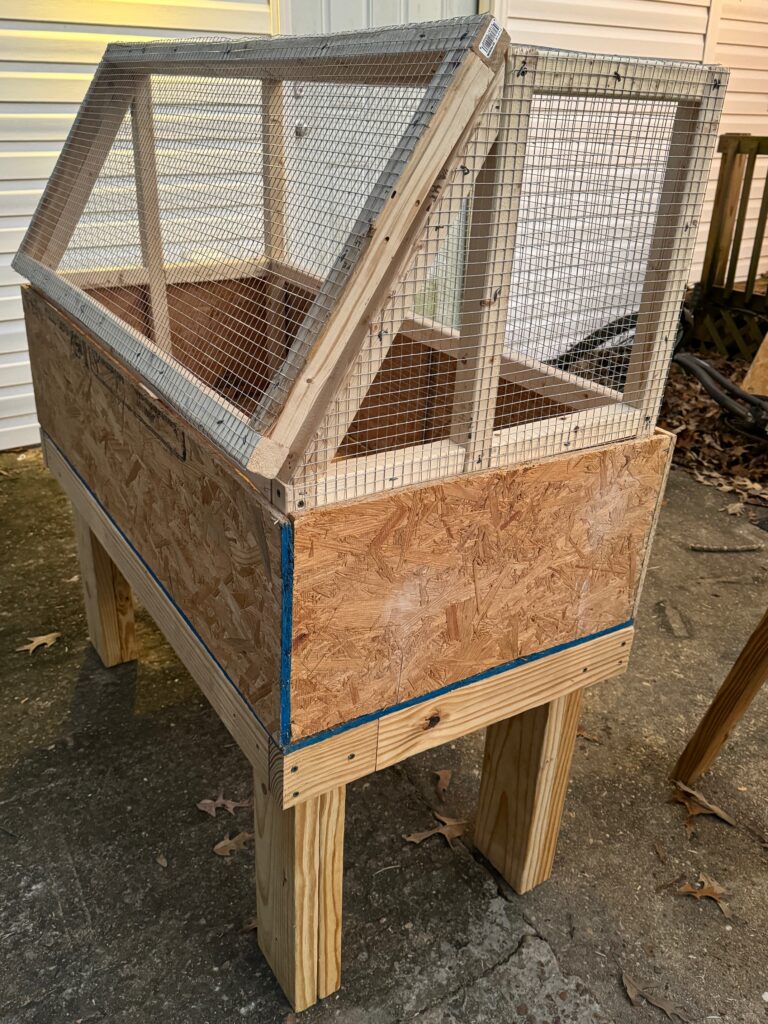
Take two 2x2x8 and cut four 28”pieces. Put the remaining two 30” pieces to the side.
Take three 2x2x8 and cut into half. Making six 2x2x4 sections.Two of these are used for the support to the top, two for the front and back support, the last two are for the door support.
Take one 2x2x8 and cut into four 8” pieces and four 10” pieces.
To build the side take one 12.5” piece and attach one 8’ piece to the top and bottom.
The front door runs the full length of the brooder. The front door is attached at the top by 2 hinges.
Cut wire mesh to size and secure with poultry net staples.
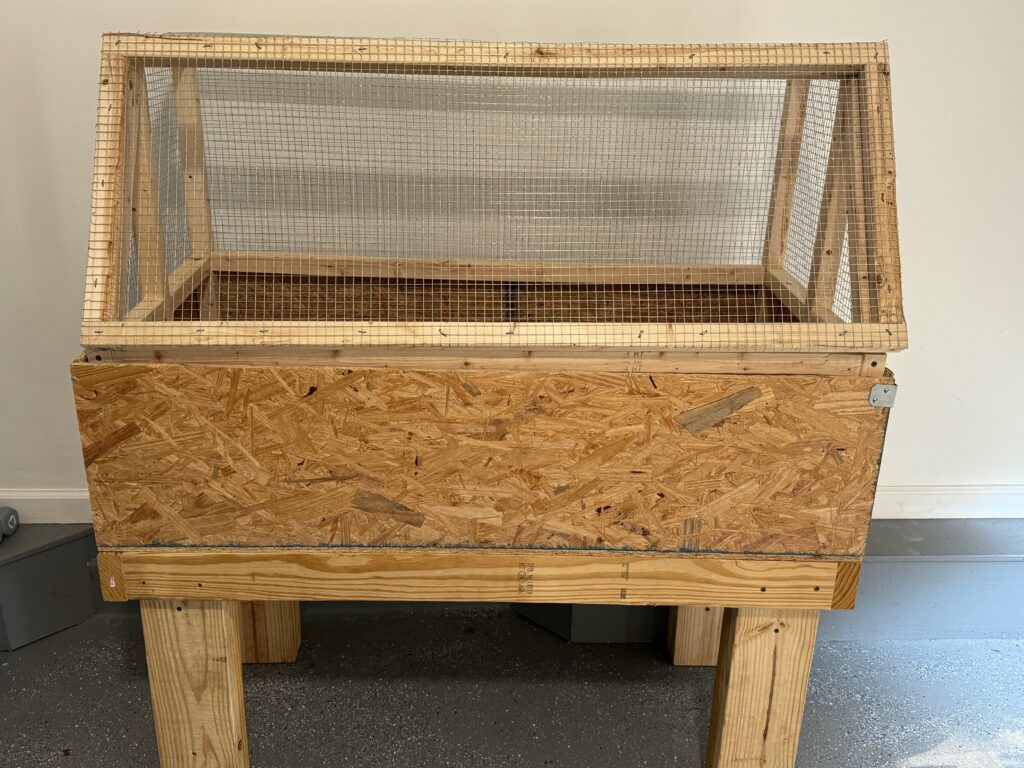
Once the bottom and top are constructed you can just drop the top right into the bottom and you have a 2 piece brooder that is really easy to clean and with the large front opening you have great access to the inside of the brooder.